
This help guide applies to both Recruiteze – Recruitment Software and iReformat – Automated Resume Formatting products.
Both the products allow for the creation of unlimited Resume Templates. Here are the steps to create a Resume Template. Only Administrator user can create a Resume Template. First thing navigate to the Create Resume Template screen from the Administration Dashboard.
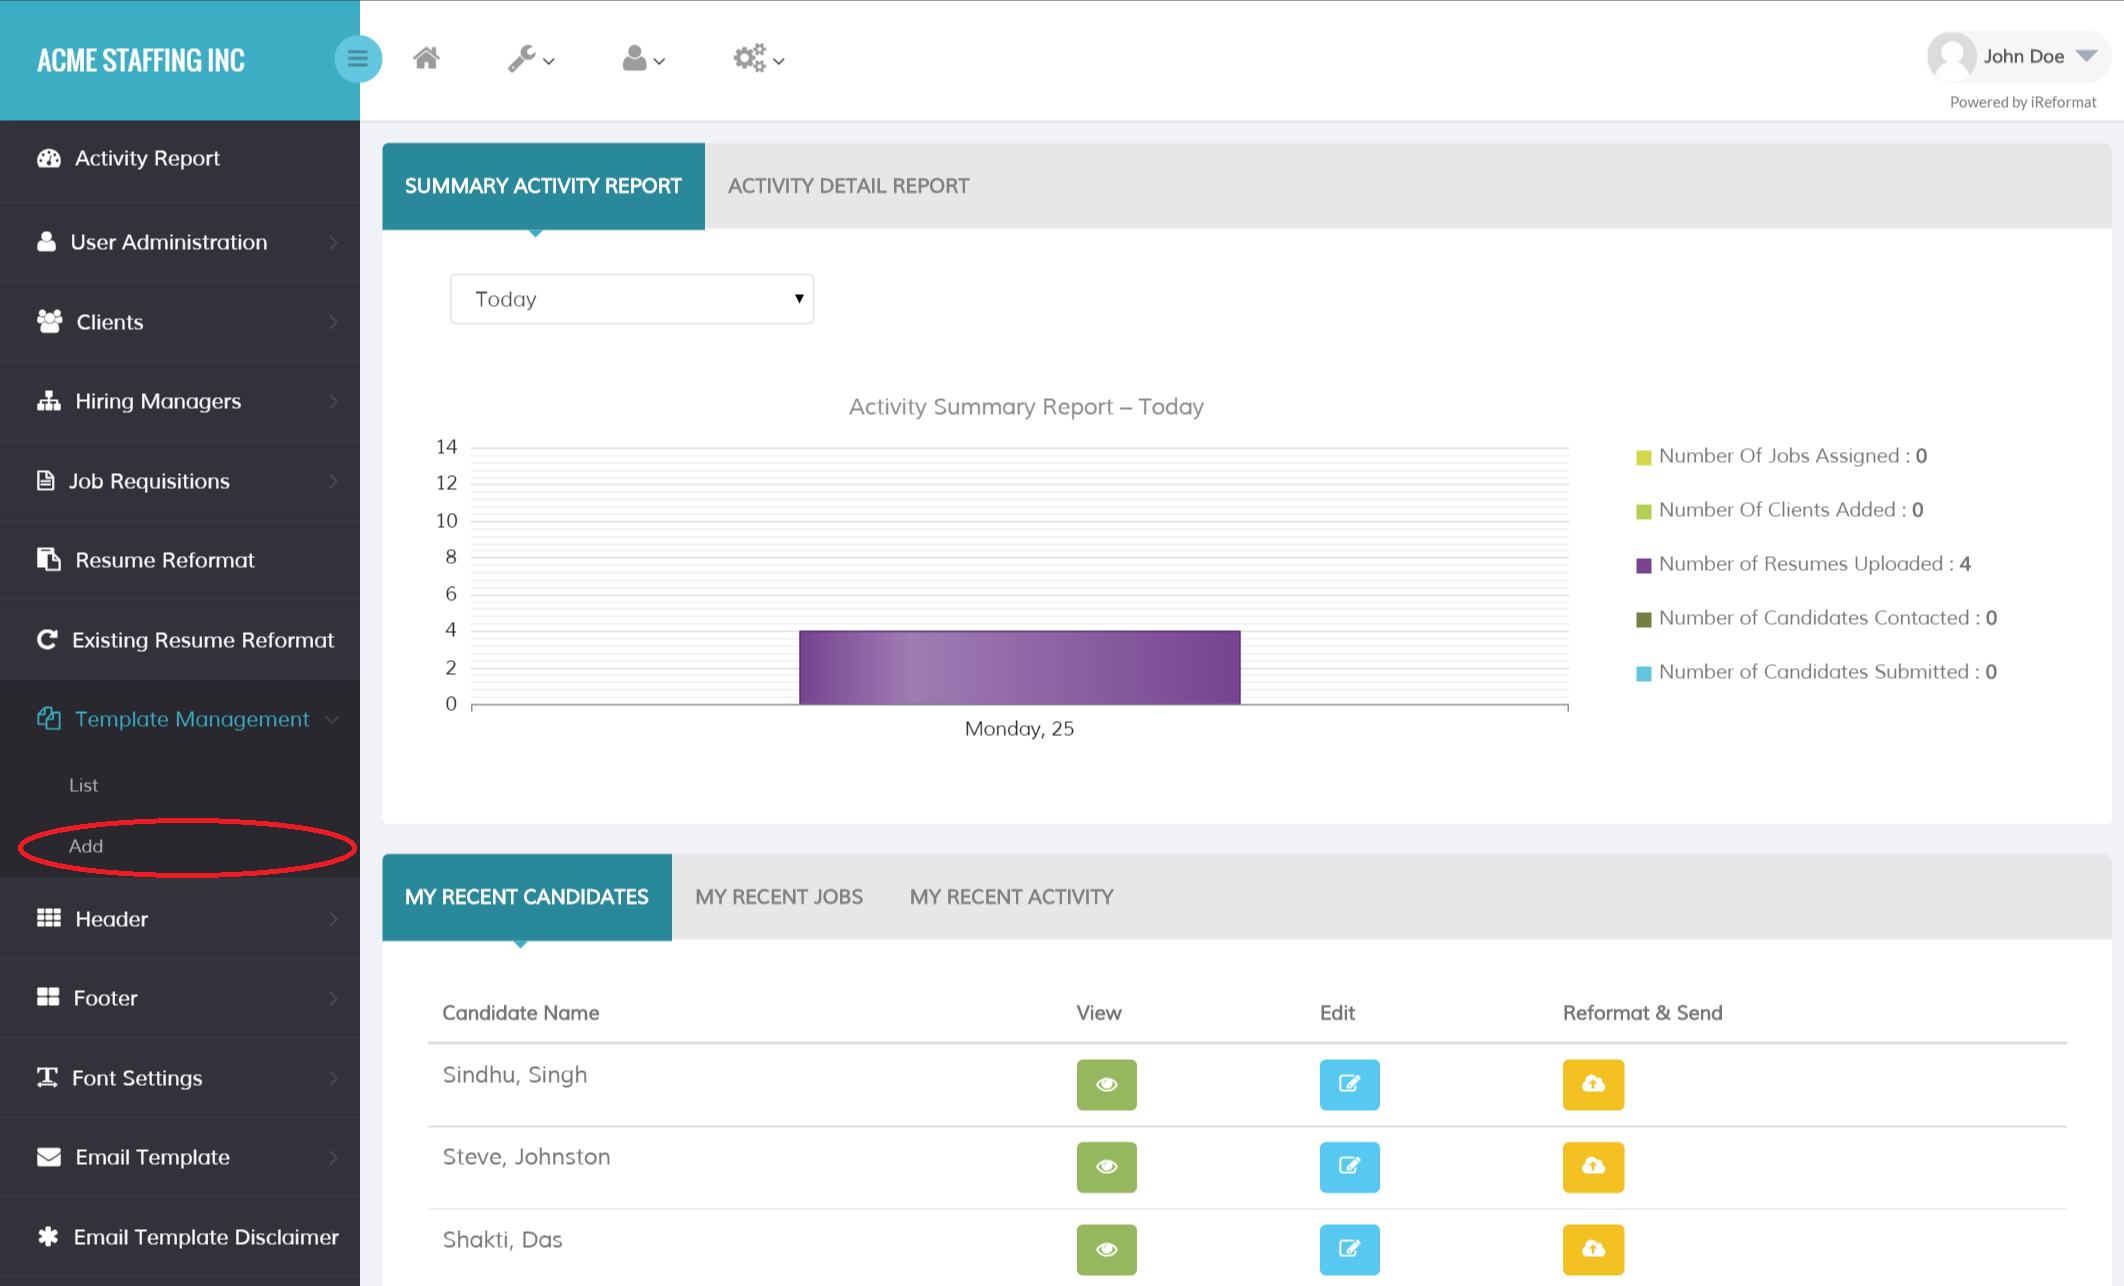
The Create Resume Template screen is shown in the image below.
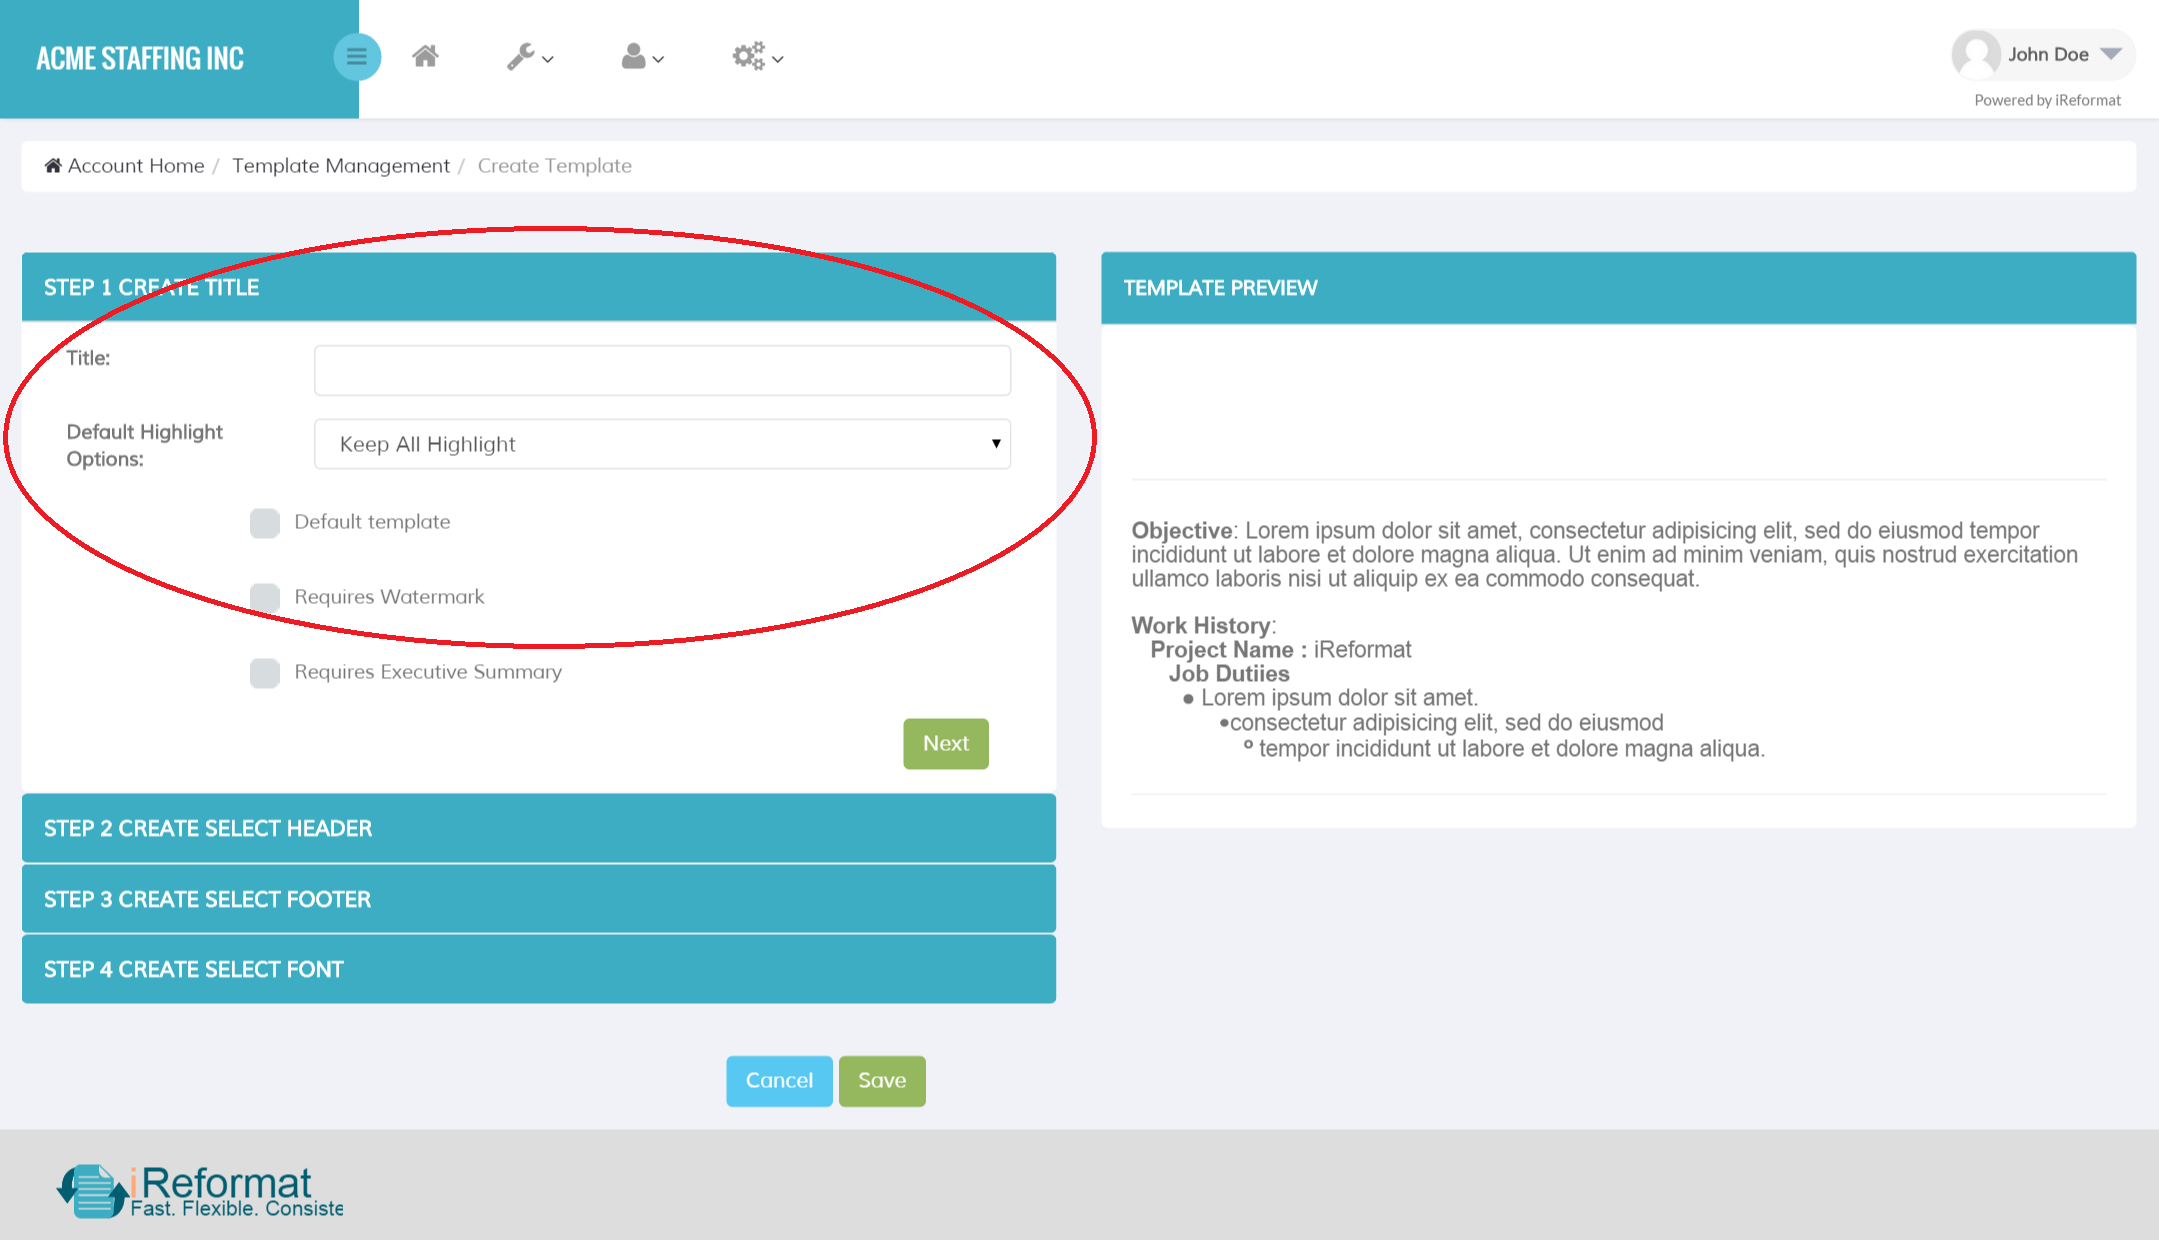
Every Resume Template will require a Title, first enter a meaningful name for your Resume Template which you can easily identify by the name.
Next pick the default Highlight Option that you want for the Resume Template you are creating, this is just to reduce a step when you use it.
Pick from one of the following options.
- Remove All Highlight
– When this option is selected, all the bold formatting is completely removed from the final Formatted Resume.
- Highlight Skill(s)/Keyword(s)
– When this option is selected, the skills entered in the Skills Box or Skills associated with the selected job requisition are highlighted ( shown in bold ) in the final formatted resume.
- Highlight Skill(s)/Keyword(s) Sentences
– When this option is selected, the whole sentences with the skills entered in the Skills Box or Skills associated with the selected job requisition are highlighted ( shown in bold ).
- Keep all Higlight
– When this option is selected, no highlighting changes are made in the Resume, it will be exactly as in the original resume.
- Remove all Highlight and Highlight Specified Skills/Keywords
– When this option is selected, all the bold formatting in the resume will be removed first, then the Skills specified in the Skills Box or the Skills associated with the Selected Job Requisition are highlighted in the Resume.
Next if you want this to be the default for the company, select the “Default Template” checkbox. There can be only one Default Template per company. When a Resume Template is selected as default, when you go to the Resume Reformat page from either the web app or the office app, the default template will be selected. This reduces one more selection when you want to quickly format and send resumes.
The next option is “Requires Watermark”. When you select this checkbox, a text field appears where you can enter the watermark text you want to appear in the formatted resume.
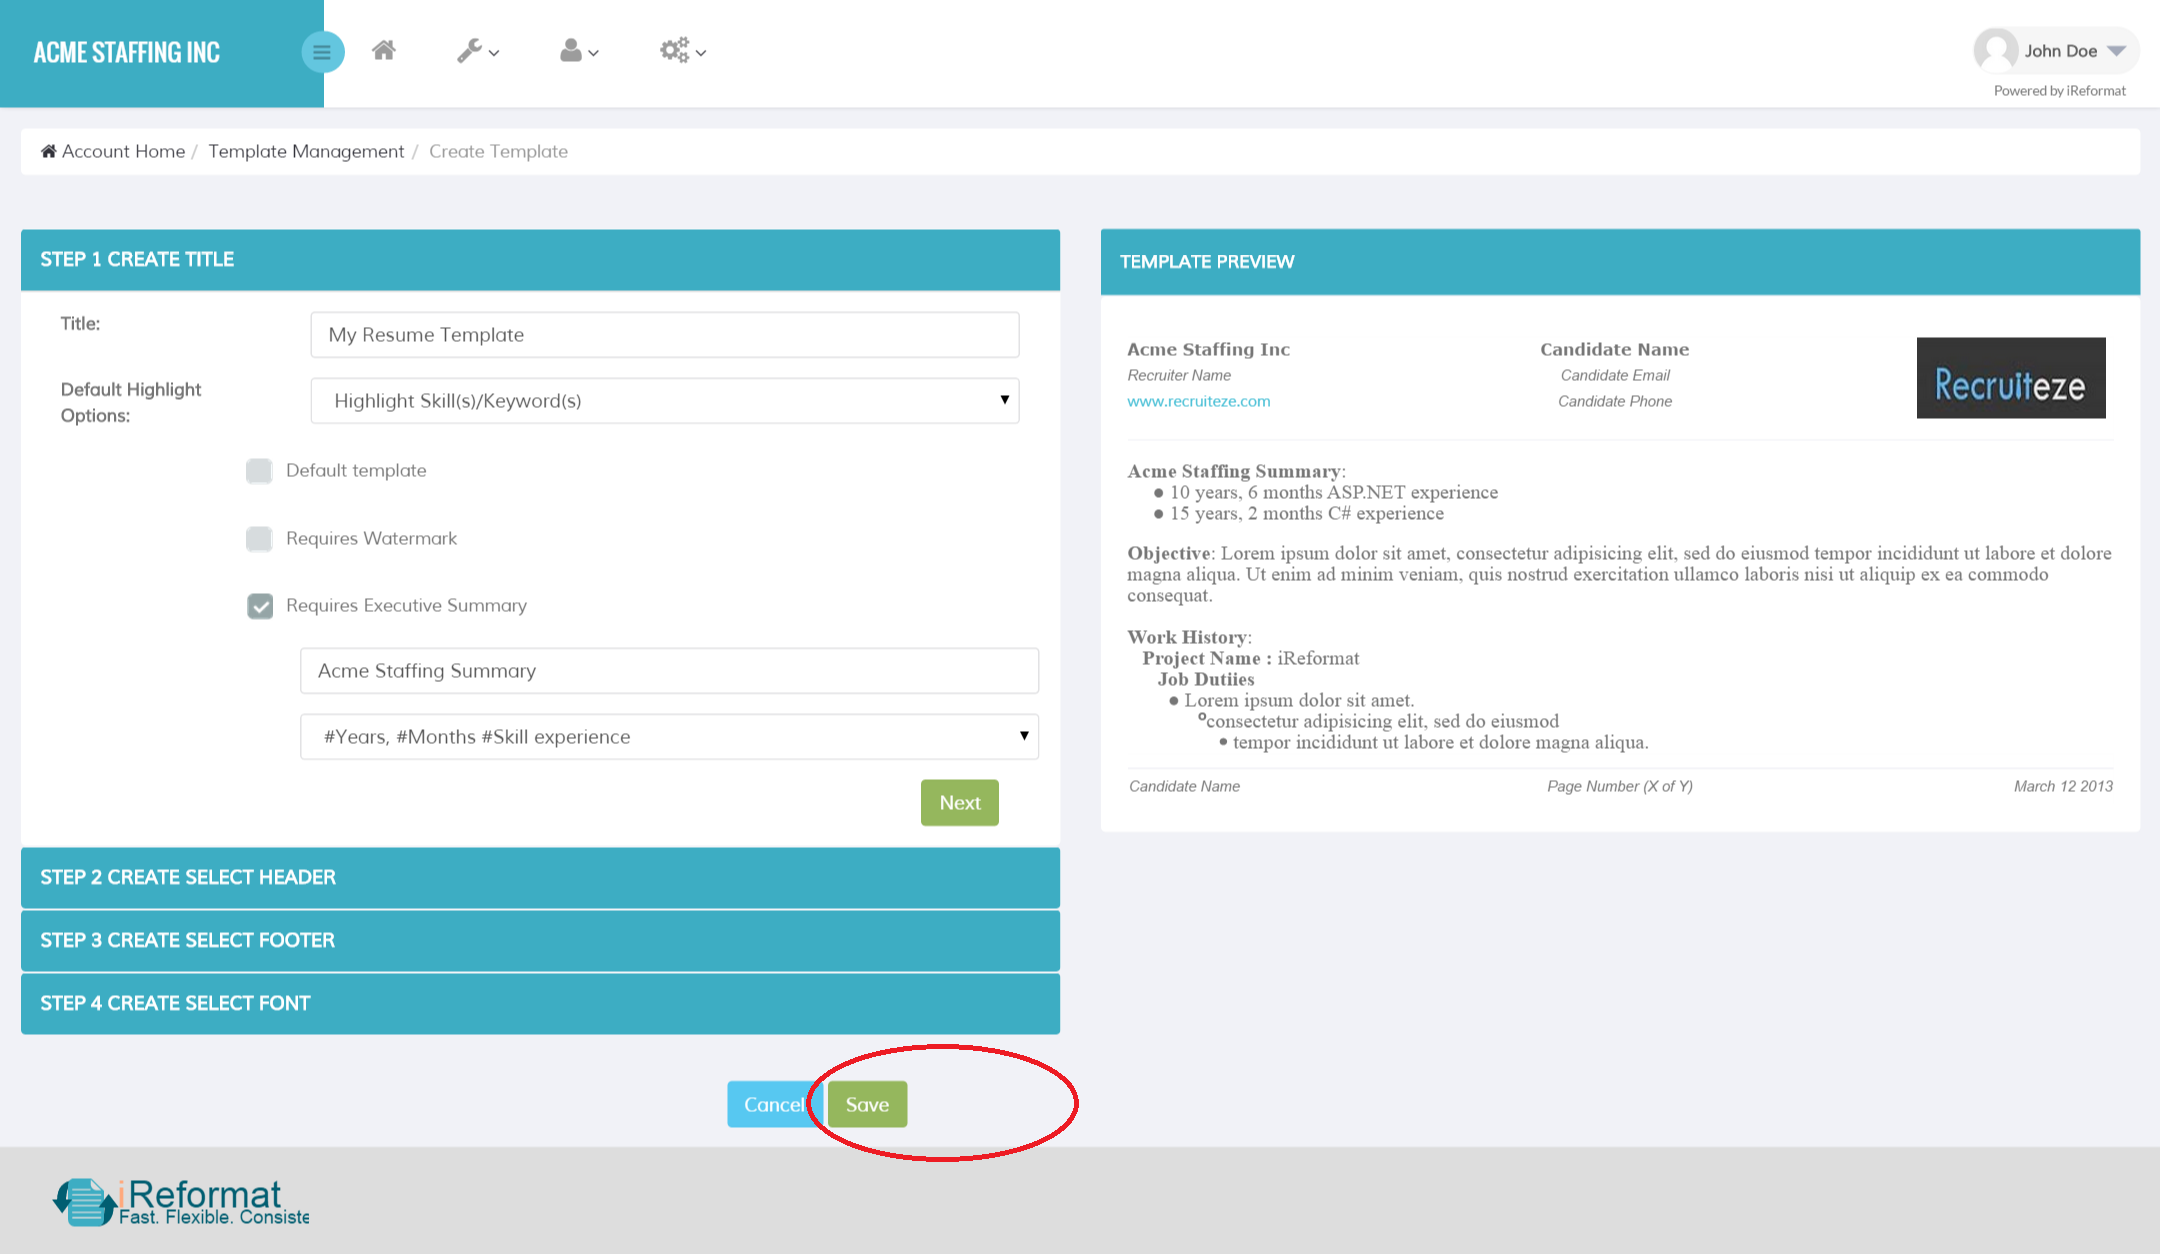
When the next checkbox “Requires Executive Summary” is selected, it opens a summary title box and a dropdown to select the summary text display options like shown in the image below.
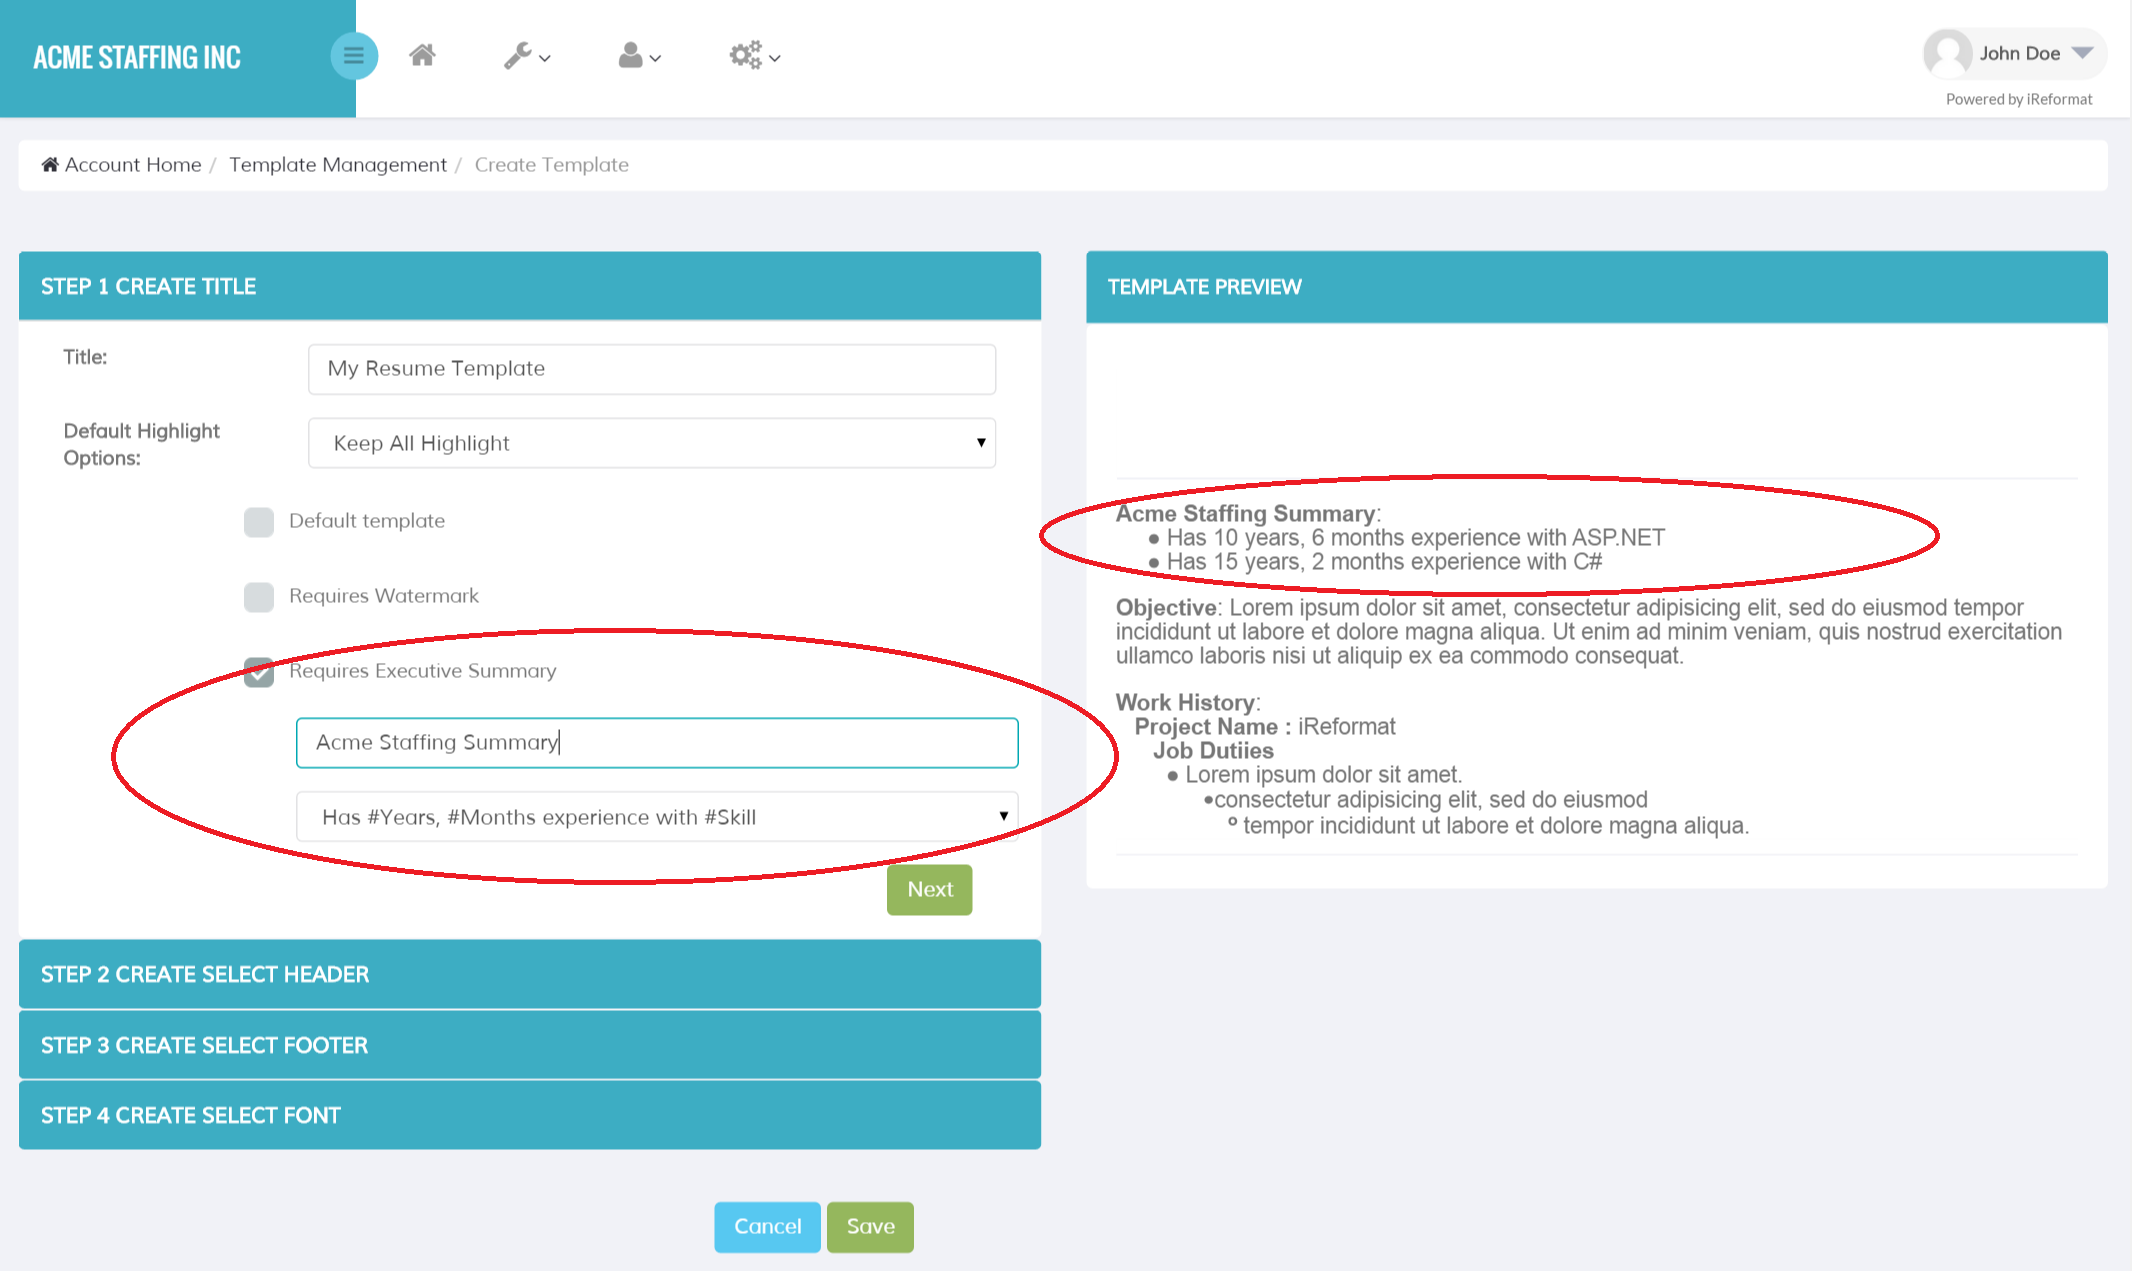
This is a very important feature, it adds a summary of the Candidates skills which are specified in the Skills box or the ones specified with the Job Requisition ( Please refer to this help article which explains how to use skills )
Enter an Executive Summary title, you can see where and how it appears in the formatted resume in the Resume Preview on the right side. Then select a summary display option from one of the available options, you can see a preview in the right side.
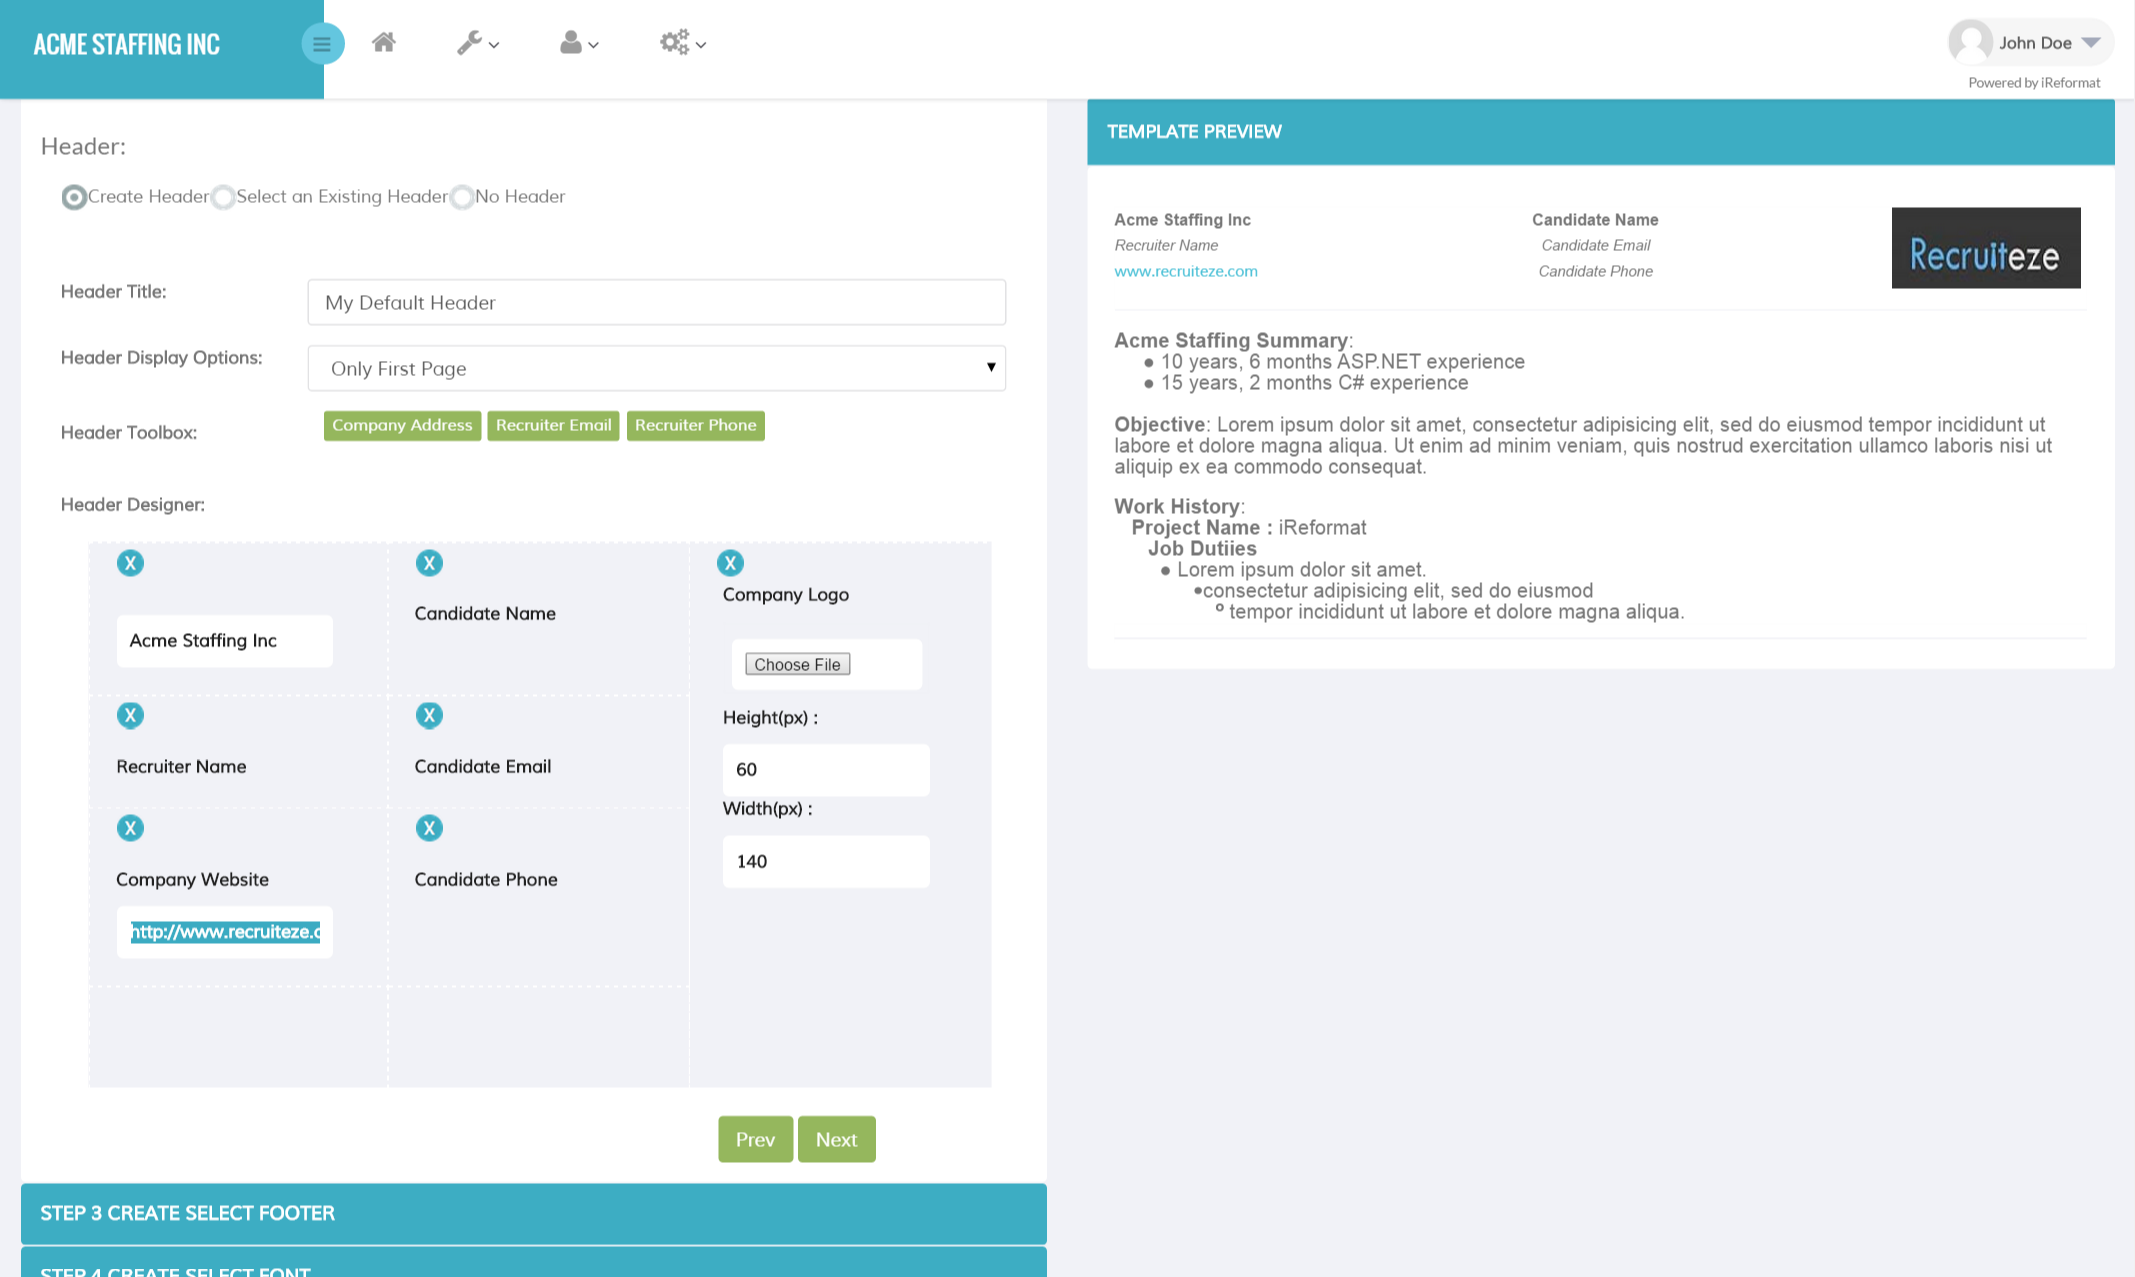
In the next section you can either select an existing header or create a new header. The image below shows the Header Section of the Resume Template Creation Wizard.
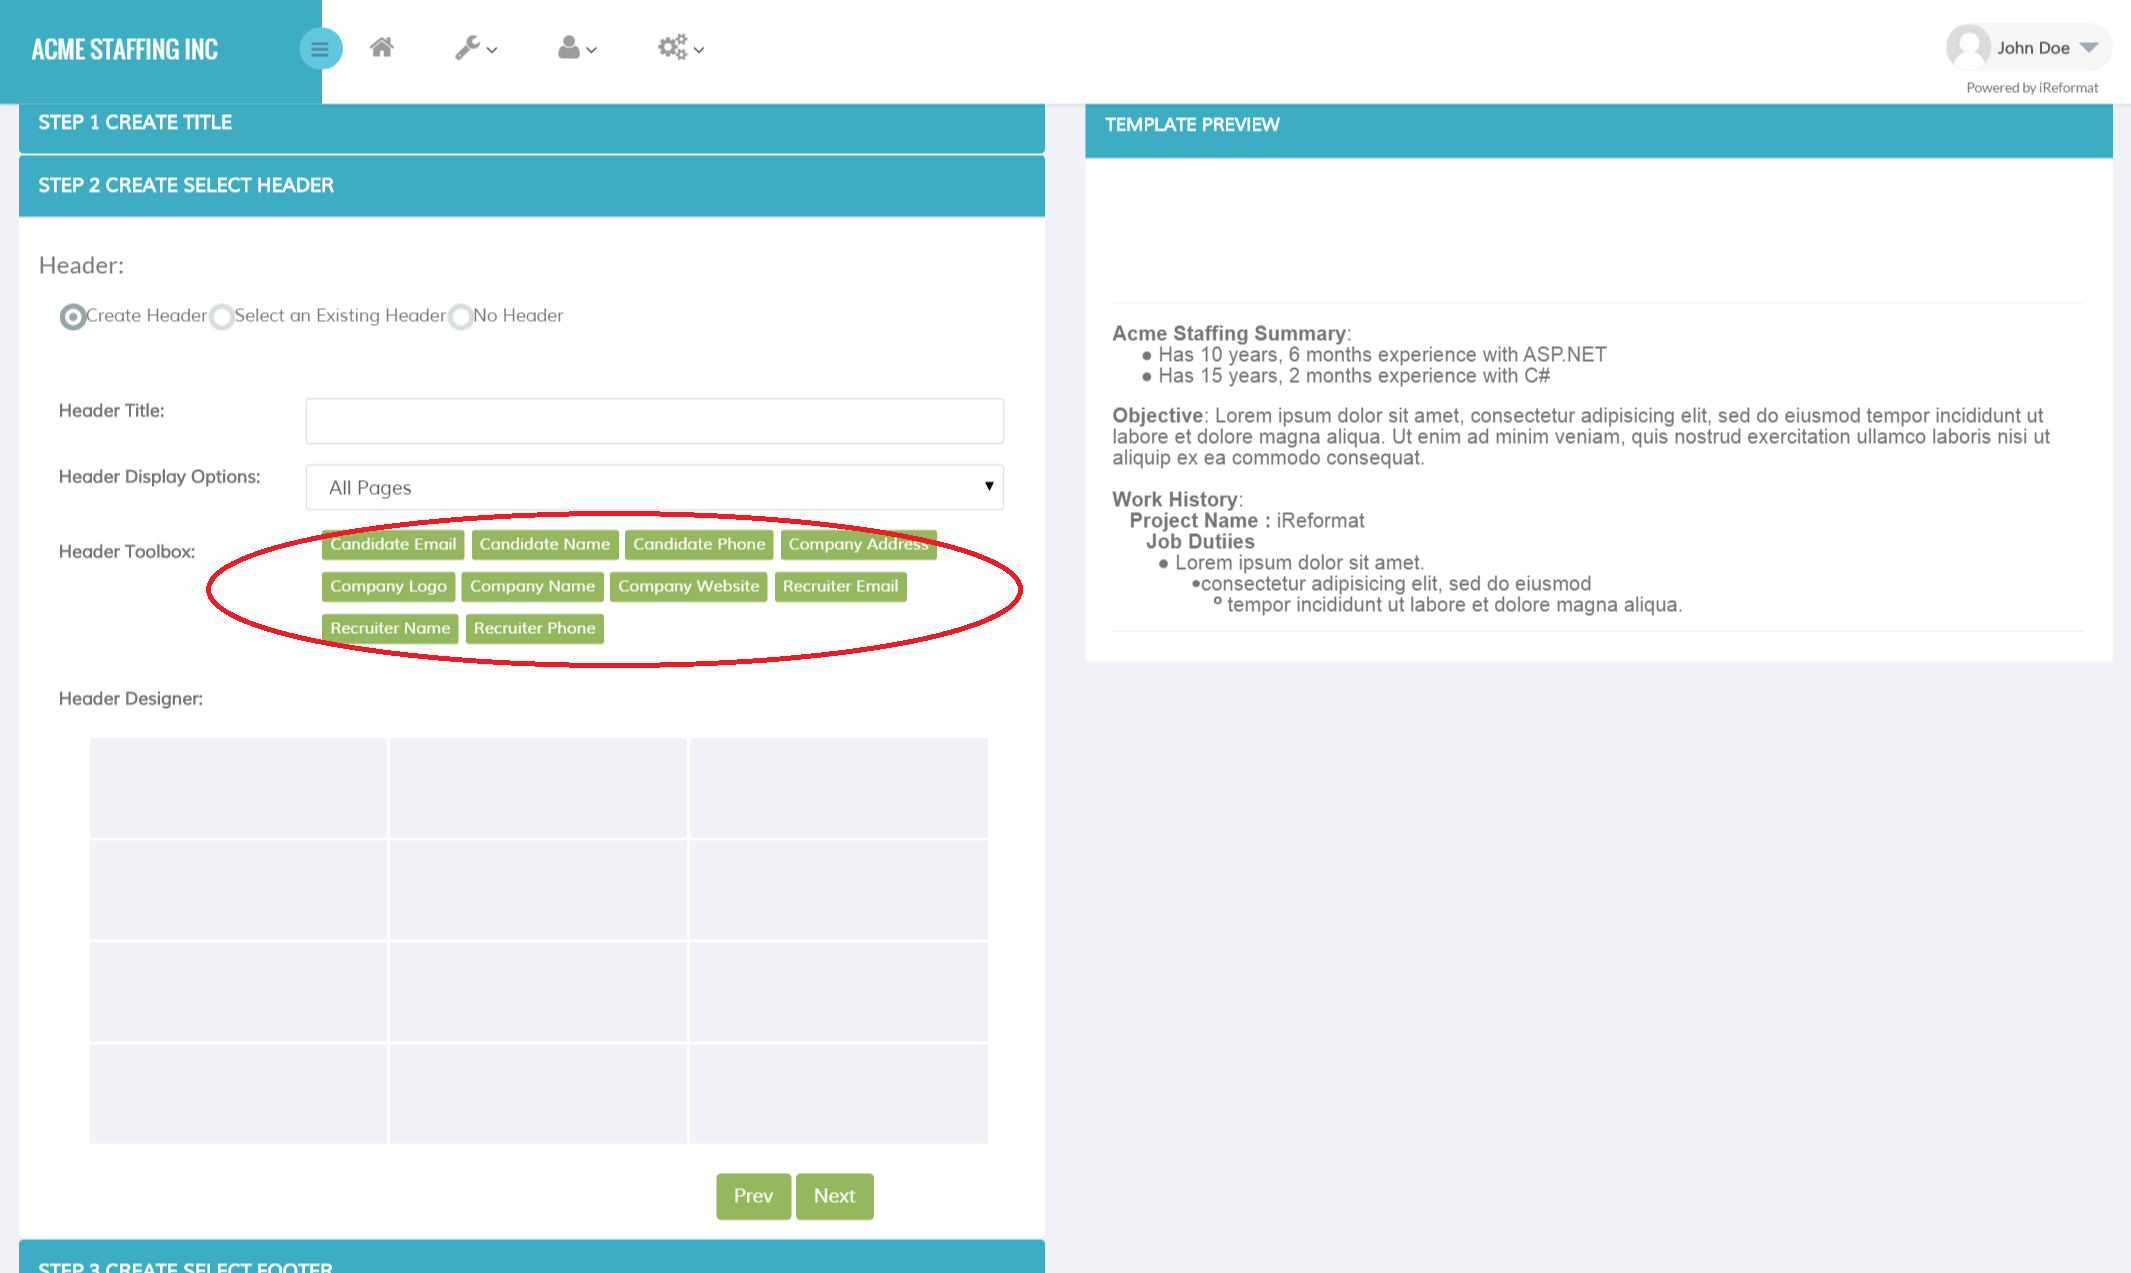
In the Header Designer Section, it allows three options to either Create a new Header, Select from an existing Header or No Header.
When the Create Header option is selected, Title box appears where you have to enter a Title for the header.
When the Select Existing Header option is selected, a dropdown with previously created Headers appears.
When the No Header option is selected, the final formatted resume will have a blank header.
Next there are the Header Display Options, by default All Pages is selected, but you can pick from the four available options
- All Pages
– This is the default setting, the header will display in all the pages of the final output.
- First Page Only
– When this option is selected, the header is displayed in the first page only
- All Even Pages
– When this option is selected, the header is displayed in all the even pages
- All Odd Pages
– When this option is selected, the header is displayed in all the odd pages.
Next you can see the circled fields which are the green items, these are the fields which can be dragged and dropped into the designer surface below. The designer surface has twelve cells, four rows and three columns, you can drag and drop the available fields in the surface. Whenever a Company Logo is added, it takes up a whole column, every other field fits within a cell.
Some of the fields like Company Name, Company Address and Company Website are editable, you can type in the desired text for these. The next image shows a fully designed Header.
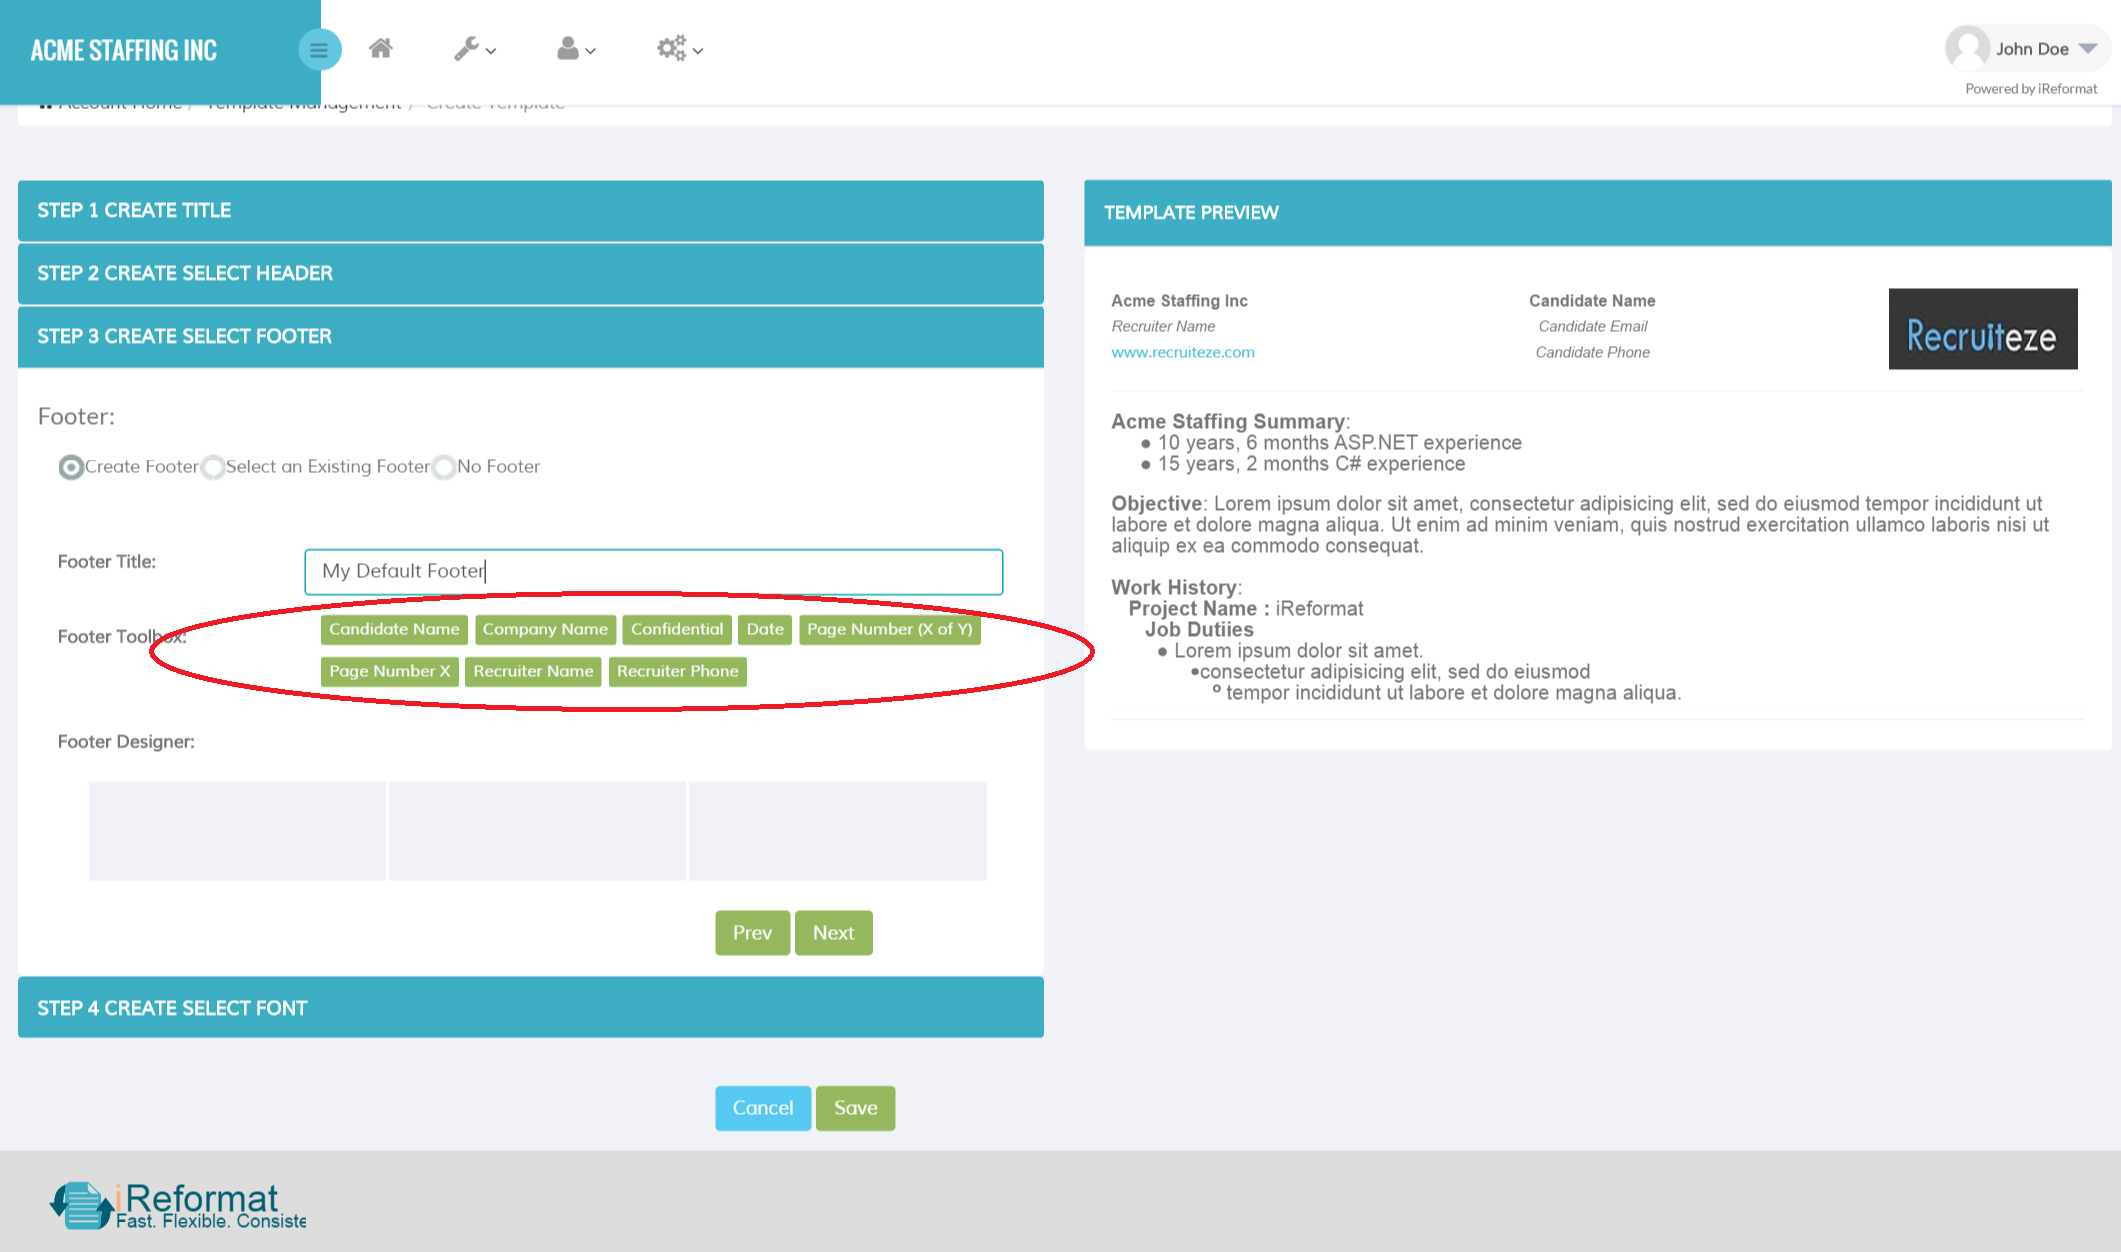
Next step is creating the Footer. It again has three options either to Create a new Footer, Select from an existing Footer or No Footer. It is very similar to the Header Creation options in how they work. The image below shows the Footer Designer in the Create Resume Template Wizard.
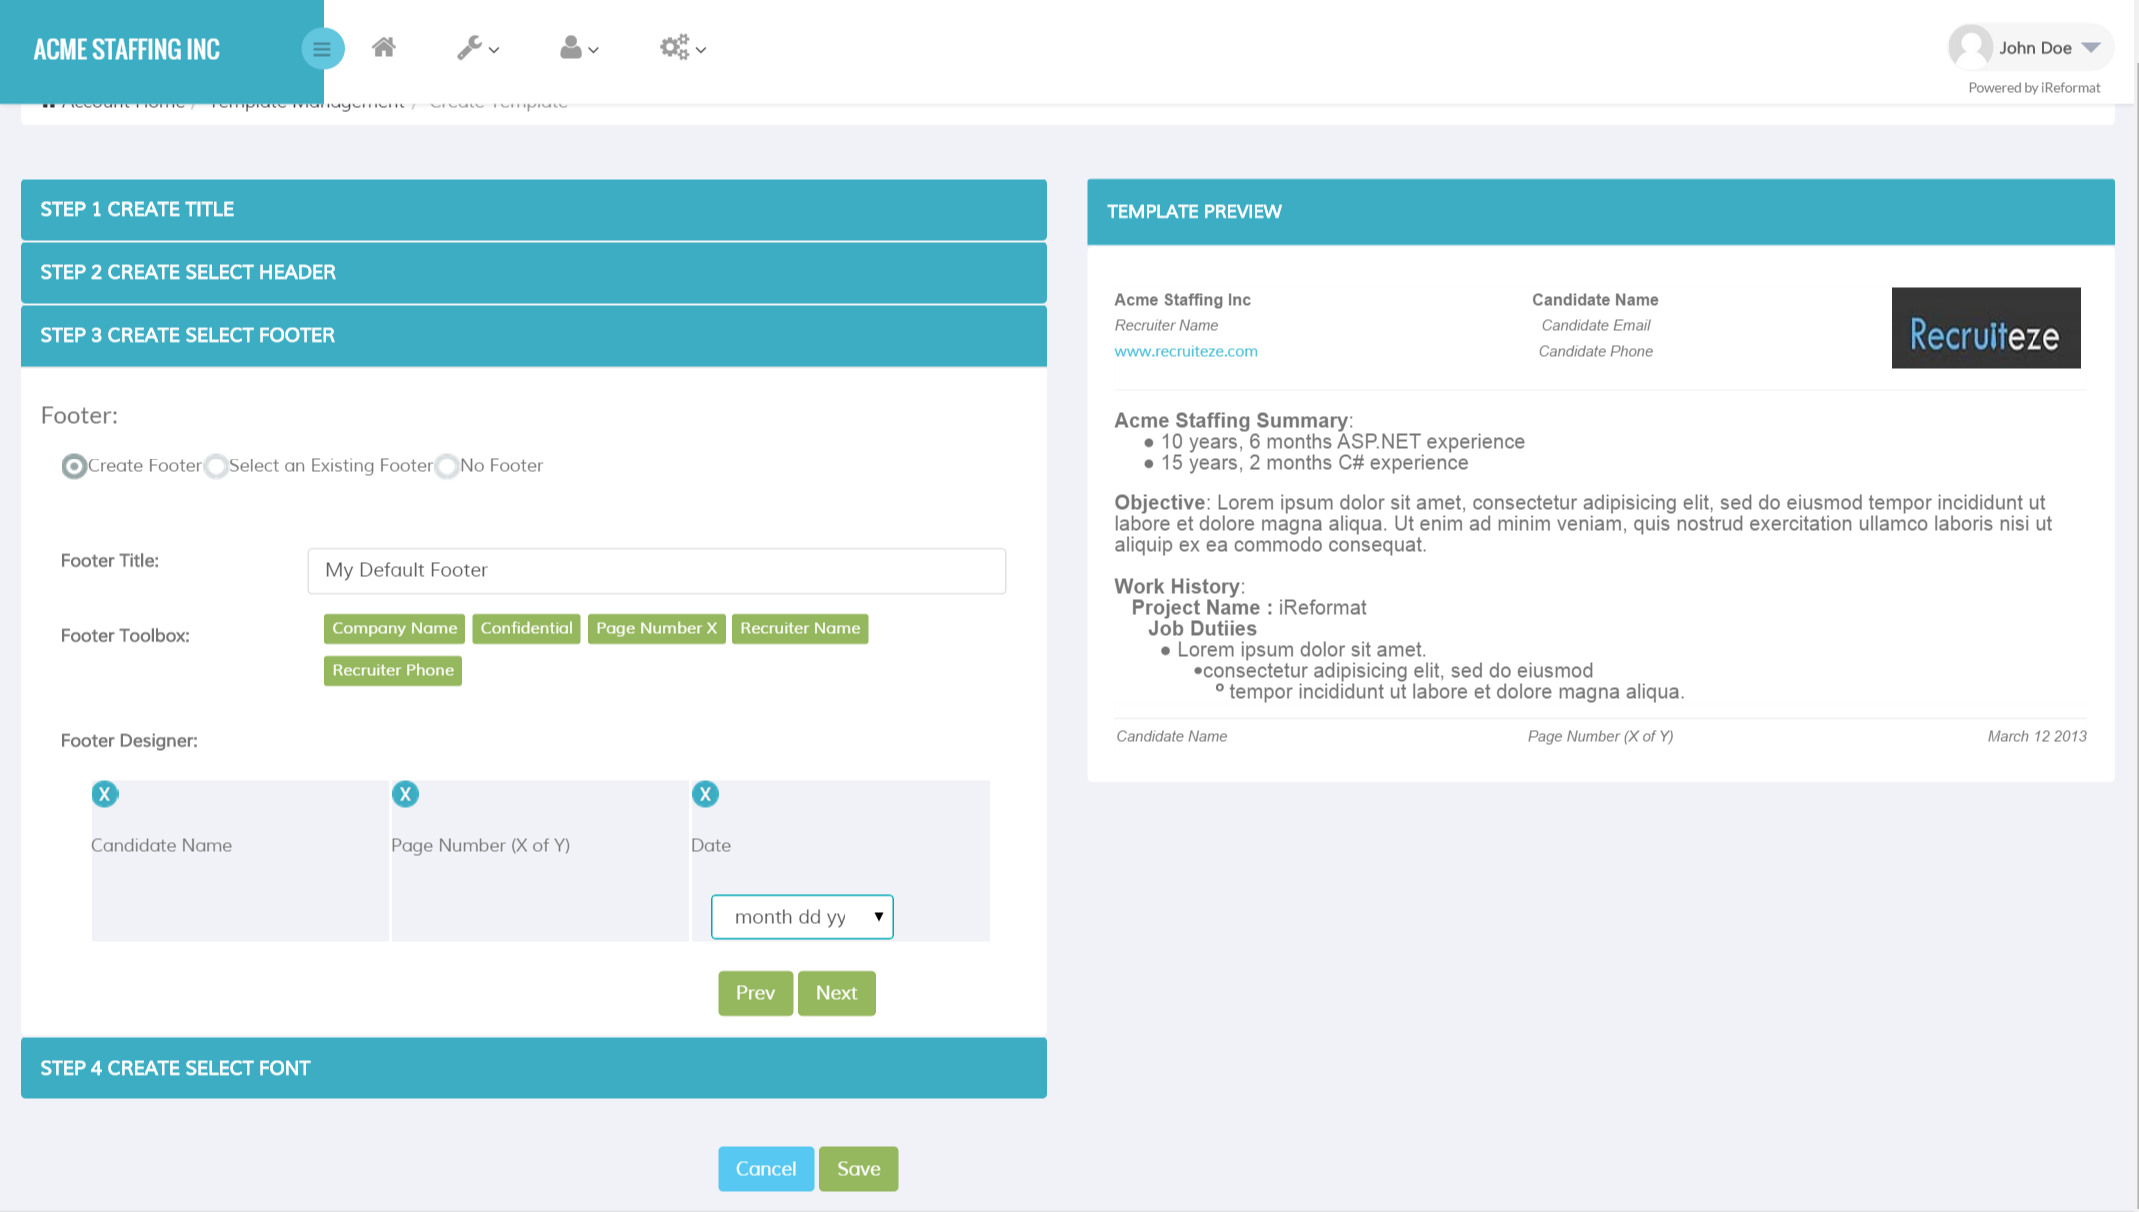
Just like the header designer you can drag and drop the fields in the single row three column Footer Designer. When you drag and drop a date field, there are some display options you can pick from. You can see how the Footer looks in the Resume Preview on the right side. The next image shows a fully designed Footer.
Next you can select your font and bullet settings for the various sections in the final formatted resume. This allows the standardization of the font and bullet settings for the resumes. Next image shows the Font Settings Designer.
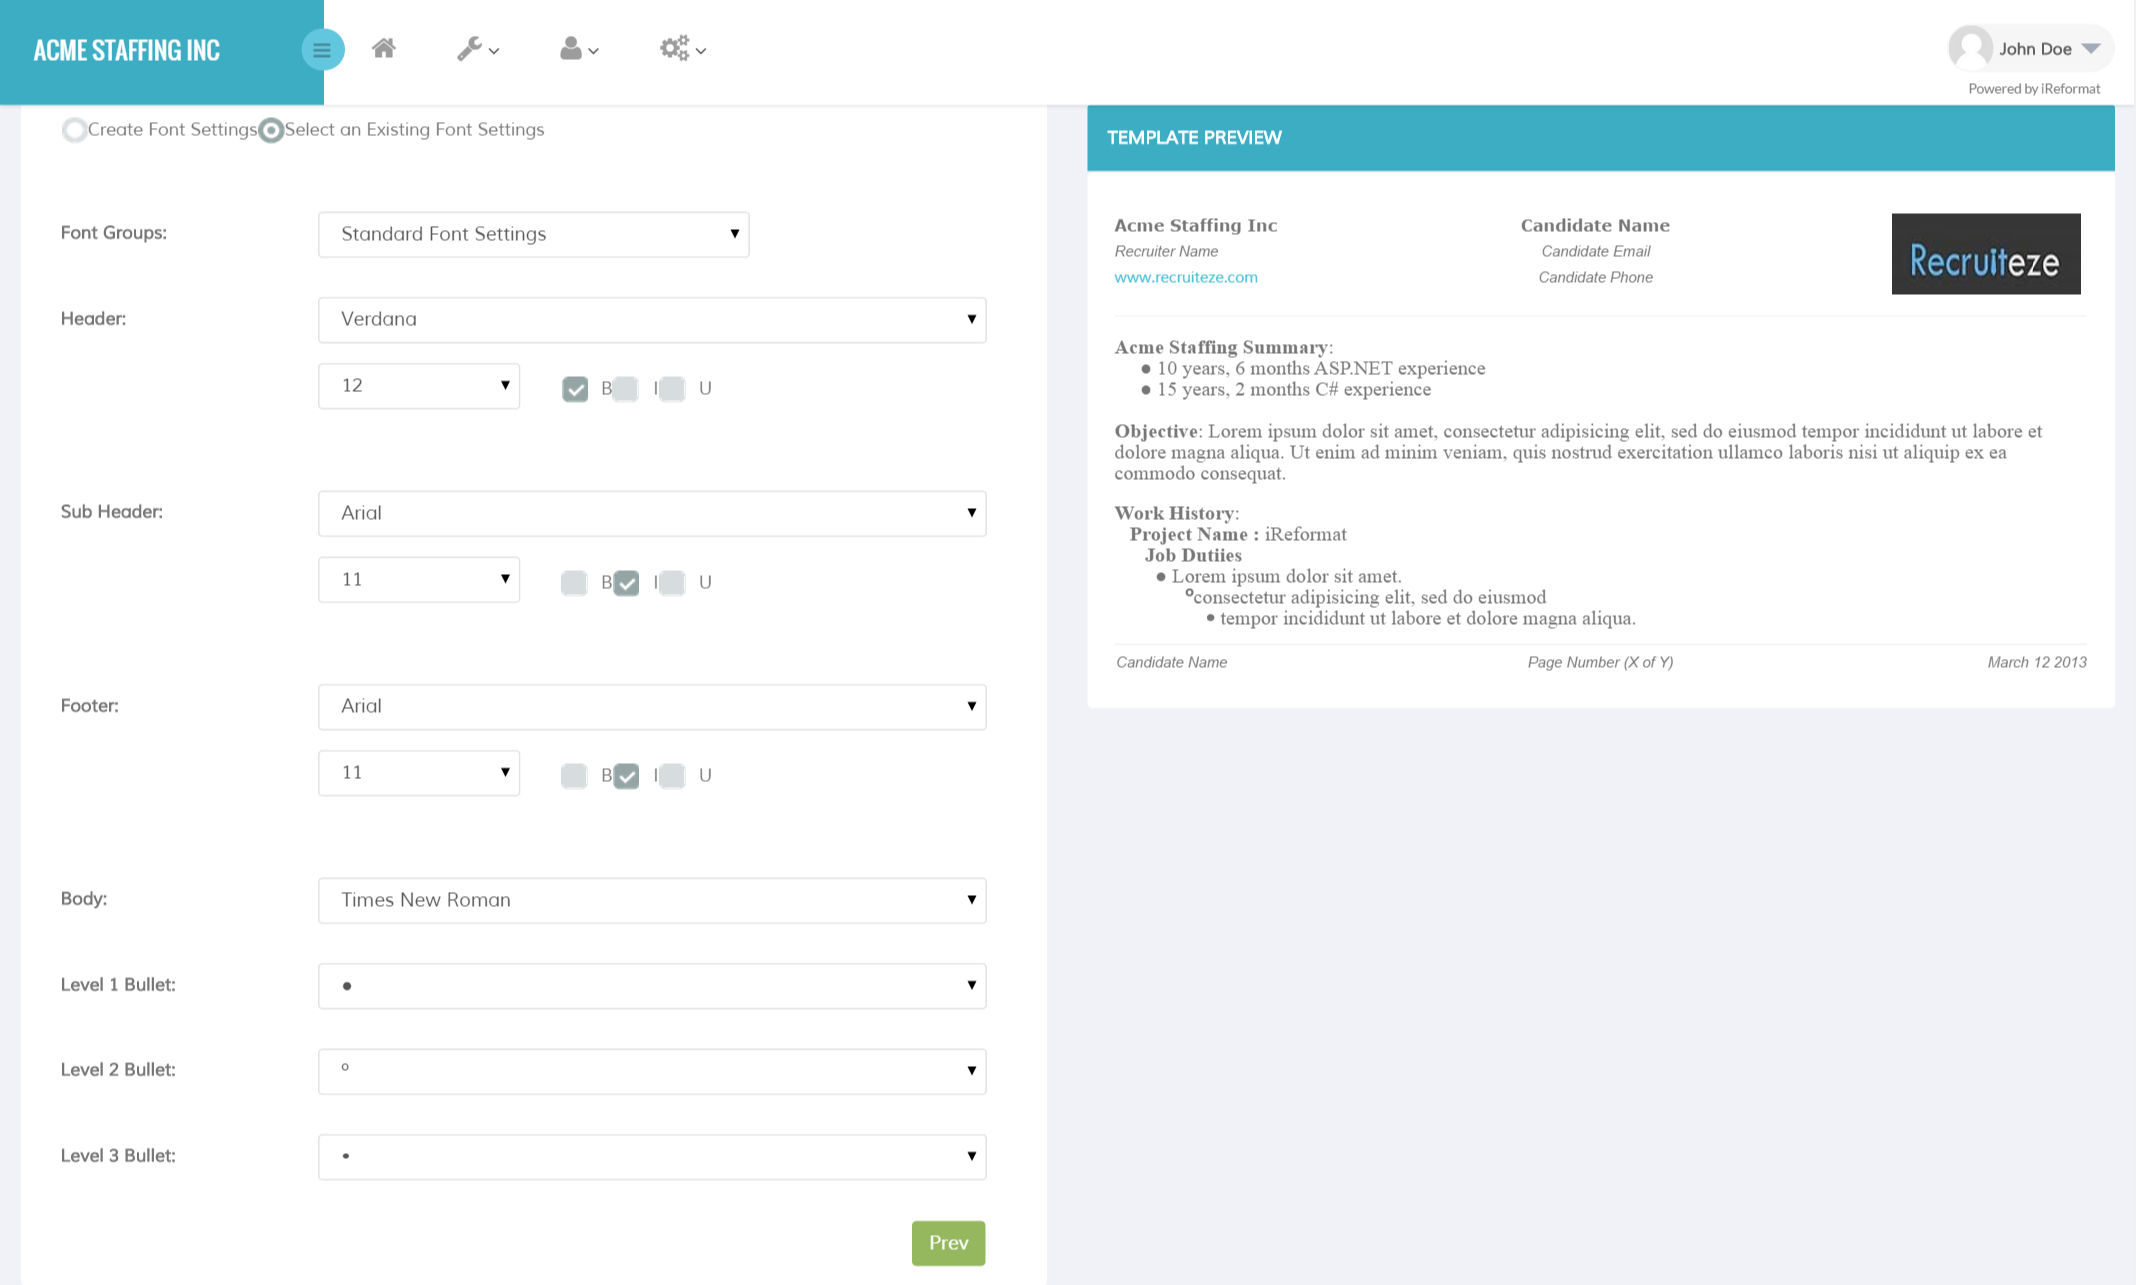
As you change the font and bullet settings you can see a preview of where and how it appears on the Resume Preview. There are three levels of bullet styles provided. Once you select the Font Settings, this completes all the required options for a Resume Template. Don’t forget to click on the Save button at the end of the Create Resume Template Wizard. Only after you click on Save your Resume Template will be created. Next image shows the Save button in the Resume Template Creation Wizard.
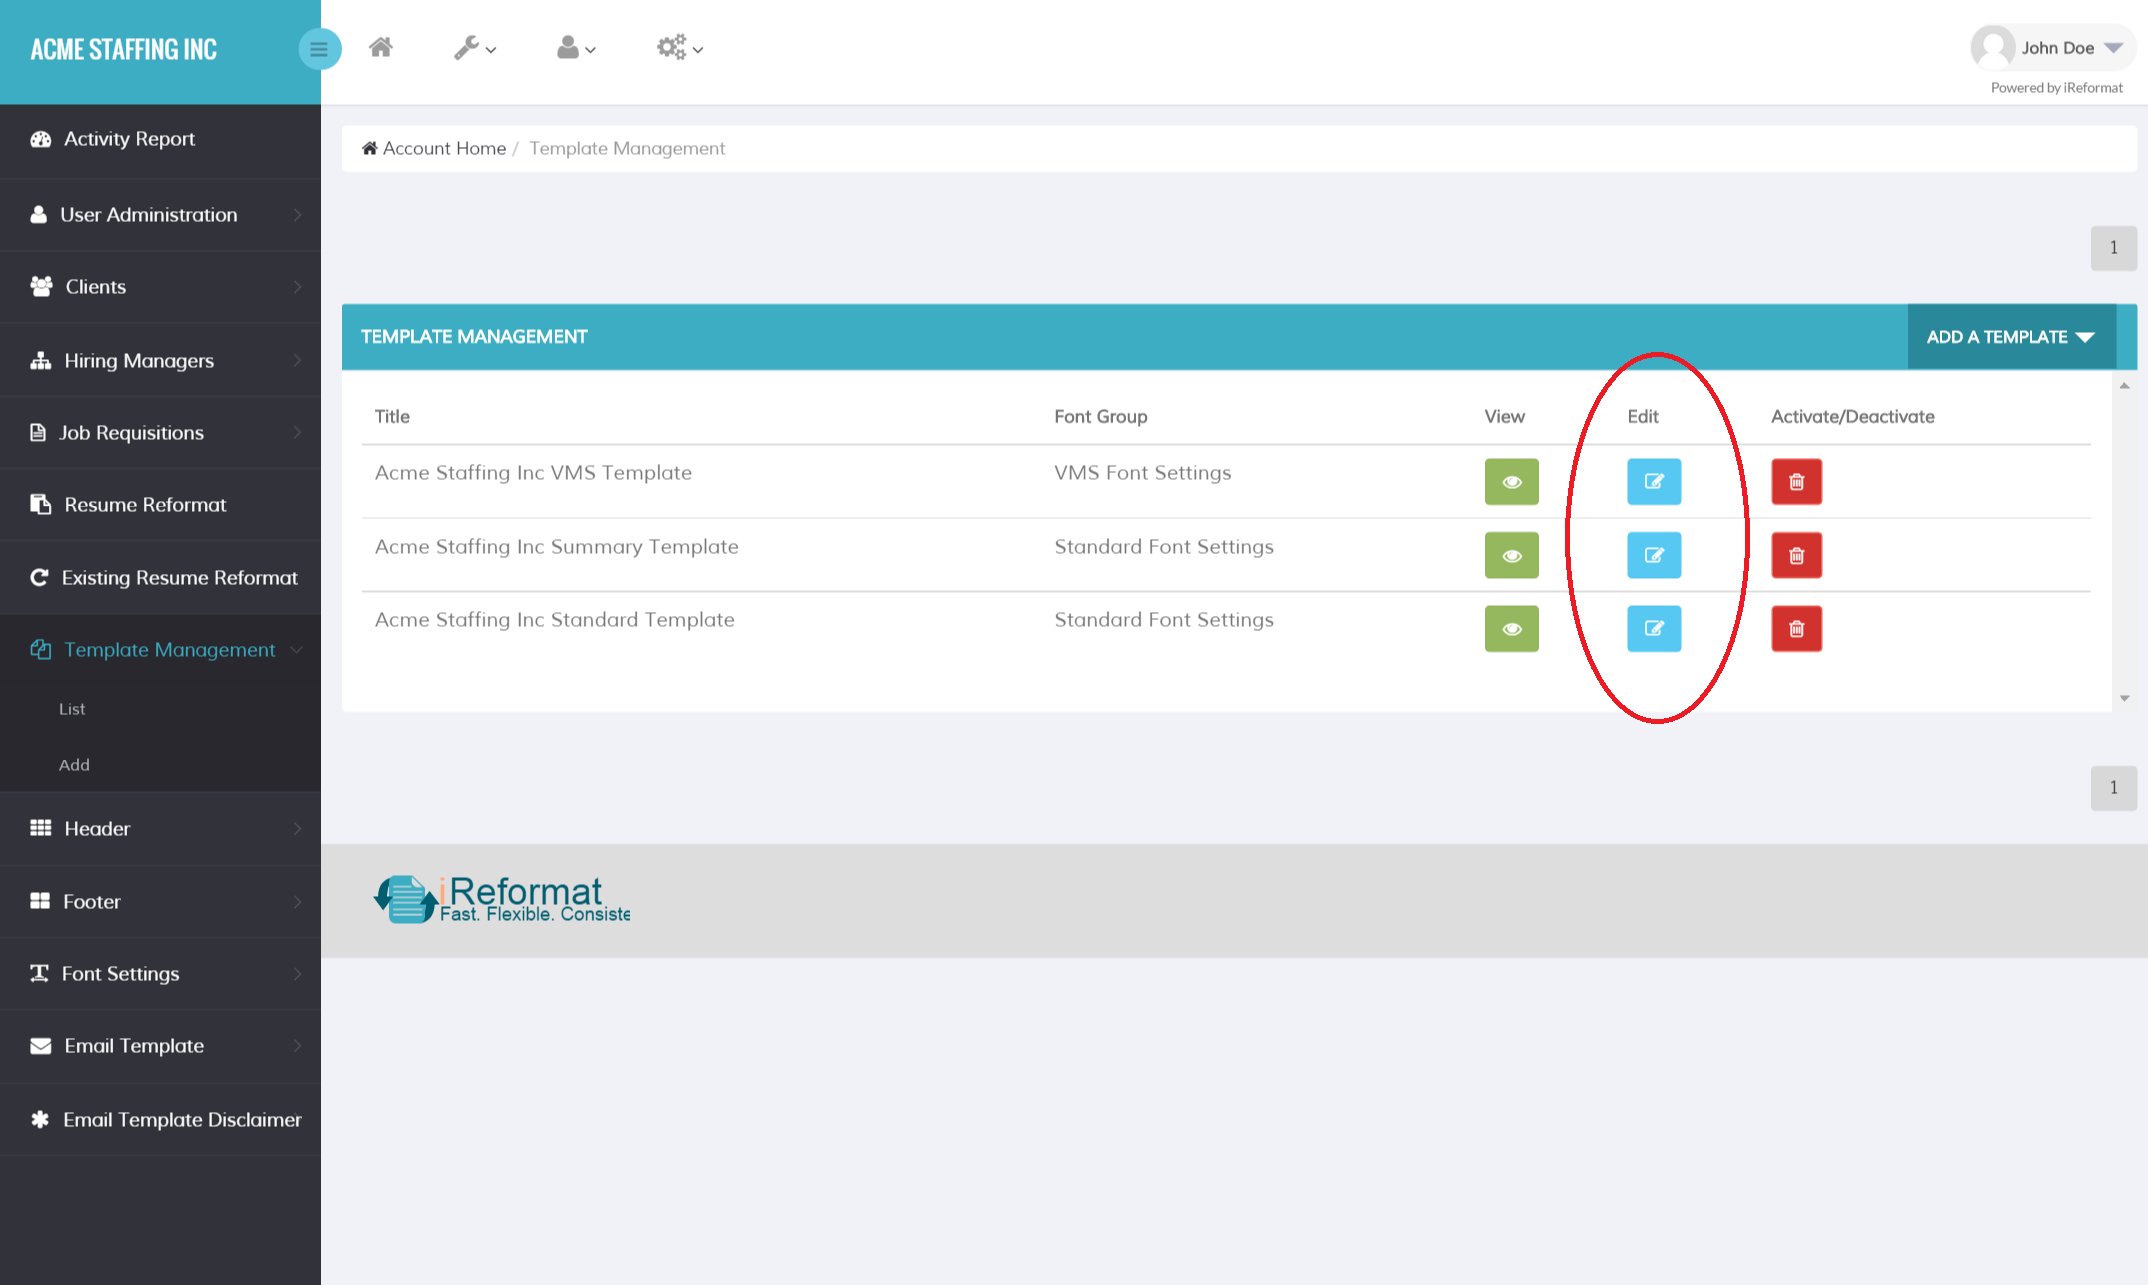
Updating an existing Resume Template is very similar to the Create Resume Template steps, except you need to select an existing Resume Template to Edit/Update from the available Resume Templates List. Next image shows how to select a resume template for editing/updating.
This completes the tutorial on how to create/update a Resume Template.
If you have any questions on how to use this or any other feature, send an email to support@ireformat.com and a representative will reply to you.
Happy Formatting!
How to format a PDF resume with iReformat
How to add a logo on a template